How to shoot pack photography from home with two lights
Pack shots are a form of clean and descriptive product photography, designed to be shot in bulk at low cost to the client. But they can still be lucrative for the photographer – if made quickly within an efficient setup.
For example, you may charge $5-$15 per shot, so making it worth while will depend entirely on how fast you work. You can't change the lighting on every product as that puts it into a more complicated and skilled area and should no longer be charged at a “pack shot” price.
In this article, we’re going to walk through how to achieve a clean white background pack shot setup where the product is grounded by a reflection and requires little to no post-production.
Usually I would use three lights as it’s easier to control the background. However, for this example, we will be keeping the equipment requirements to a minimum by using only two lights.
I’d suggest a trip to your local Officeworks, Bunnings and plastics supplier to grab a few essentials before you start.
What you’ll need:
- 1 x table, stool or similar for perspex to be placed on
- 1 x reflective white perspex large enough for the product to fit on
- 2 x flash heads (can be speedlights though will be easier to use lights that have a modelling light)
- 1 x large softbox (120 x 180cm was used in this demonstration)
- 1 x floor stand for the background light to stand on and sit beneath table
- 1 x C-Stand or background system to hold half paper roll (if you don’t have a white wall available)
- 1 x light stand for holding your key light (Manfrotto 1004 used in example)
- 1x mirror perspex, white foam board, blue tac and black card to control fill on opposite side of key light
- 1 x tripod, camera and long lens (Canon EF 70-200mm f/2.8L IS III USM used for this)
- Tethering cable ideal but not required and computer
- White balance card
- Compressed air/ various cleaning products/ micro-fibre cloth
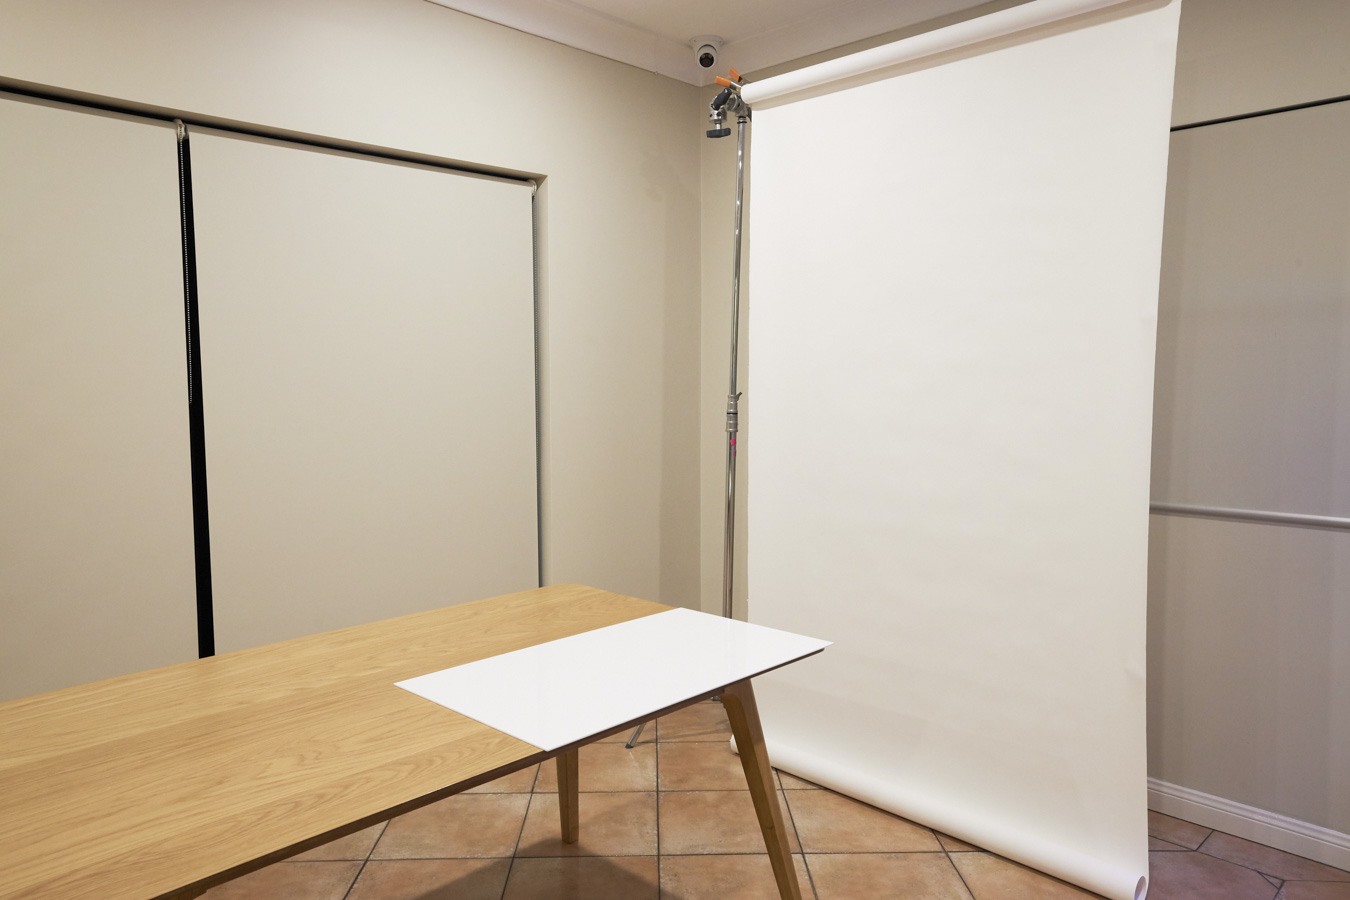
Step one – space
Clear the space you’ll be using and position the table centred to background.
Step two – surface
Place white Perspex on the table and position it to the back corner. Ensure you clean the perspex with a micro-fibre cloth or compressed air before setting in place (dust and spots will show up if you don’t otherwise).
Step three – background
Set up the white paper roll if you don’t have a white wall available for your background – remembering to clamp the top when the length is correct.
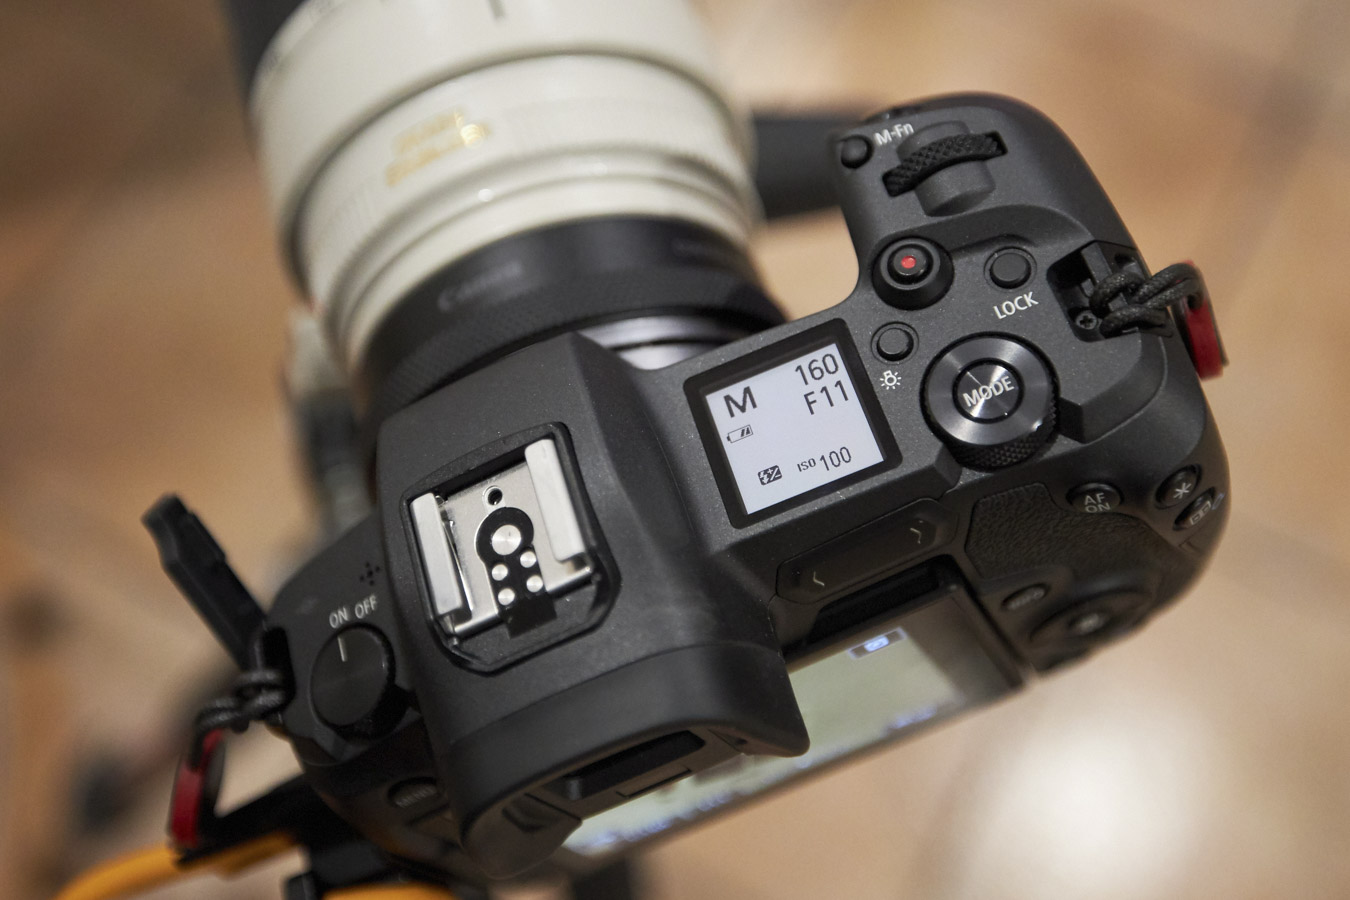
Step four – camera settings
Set desired camera settings, in this case I have the camera set to ISO 100, f11, 1/160s and I’m using the Canon EF 70-200mm f/2.8L IS III USM as it allows me to shoot a little further away. Depending on the size of the product, I can zoom in or out to change composition without having to change lens. Again, it’s all about efficiency to maximise productivity.
Step five – composition
Place the first product down and line camera position up so that everything is level. If you don’t level perfectly during setup, this will add time to each image in post-production which adds up when you’re shooting a high quantity of images.
Step six – ambient light
Take a test shot without any flash to ensure the frame is black. If anything is illuminated, this means ambient light is affecting your shot which could cause problems.
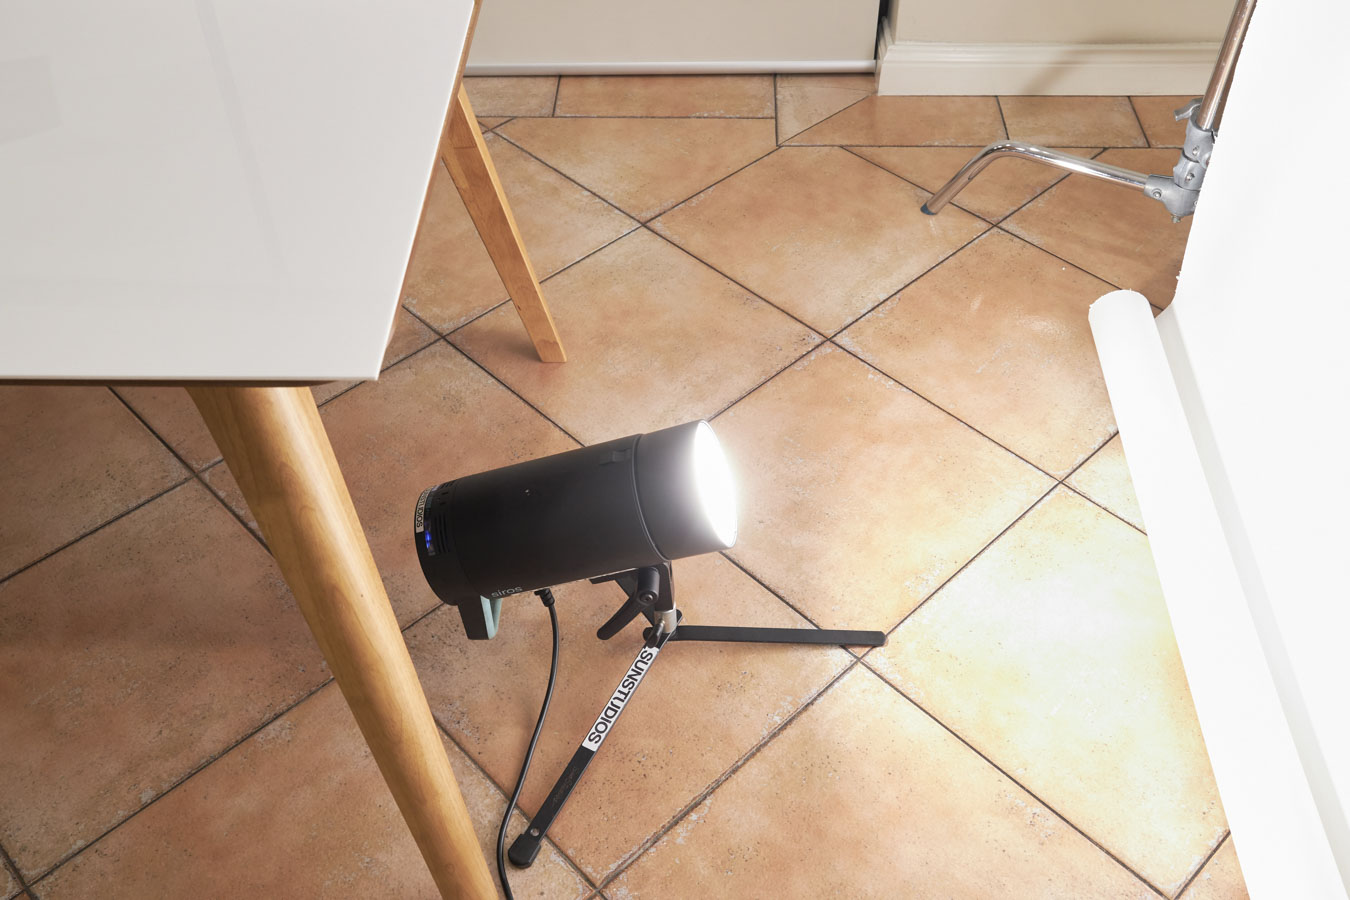
Step seven – white background
Position the background light directly under the table aiming around the middle and centred so that you get the most even spread of light. Note: it’s good to be a reasonable distance back as this helps with evenly spreading the light across your background. Take a test shot and check the readings of the exposure.
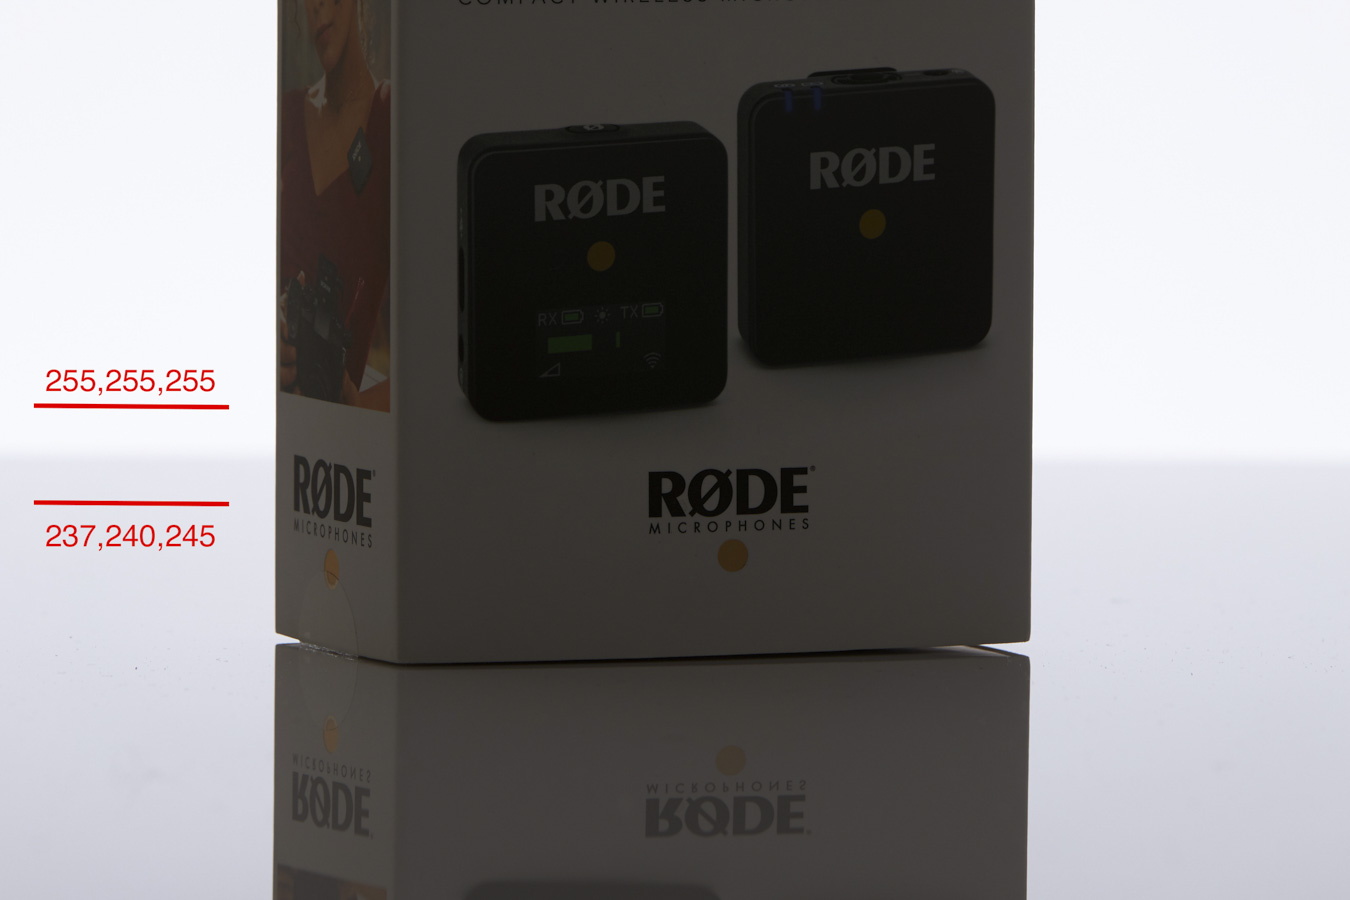
In this example I’m using a program called Capture One which displays 0,0,0 = black and 255,255,255 = white. If you’re using Lightroom, it will show 0,0,0 = black to 100, 100 ,100 = white.
I want the reading to be 255, 255, 255 across all of the background and surface which would be white and not require any postproduction. If you’ve got a reading of 240,240,240 – to your eye it will look white but will require post-production if the client wants it to look pure white on their website.
To get the readings to 255, you will need to add more light to the background, so turn the background light up a notch and take another shot. Do this until you reach 255. If the first shot that you took is already at 255 then reduce the power until you come just under that and then go up in power in small increments until it just hits 255. Tip: if you are quite a bit overpowered on your background then this could cause flaring problems.
As you can see in this image, I have the middle of the background exposed correctly but the top of the background and the surface is under exposed and you can see the line of where the Perspex ends on the table (the exposure has been reduced slightly to show the comparison better).
To eliminate this, you need to find where the reflection of the table is coming from on the background.
When photographing reflective or shiny surfaces, you’re not lighting the surface, you’re photographing the reflection. If you have someone around to help, ask them to hold something bright across the background until you can see the reflection show up in camera (you can always turn live view on and point the computer to you and do it yourself). When you see the reflection, position it until it covers the surface and that’s where you’ll want to add more light.
In this case I just need to position the light a little higher.
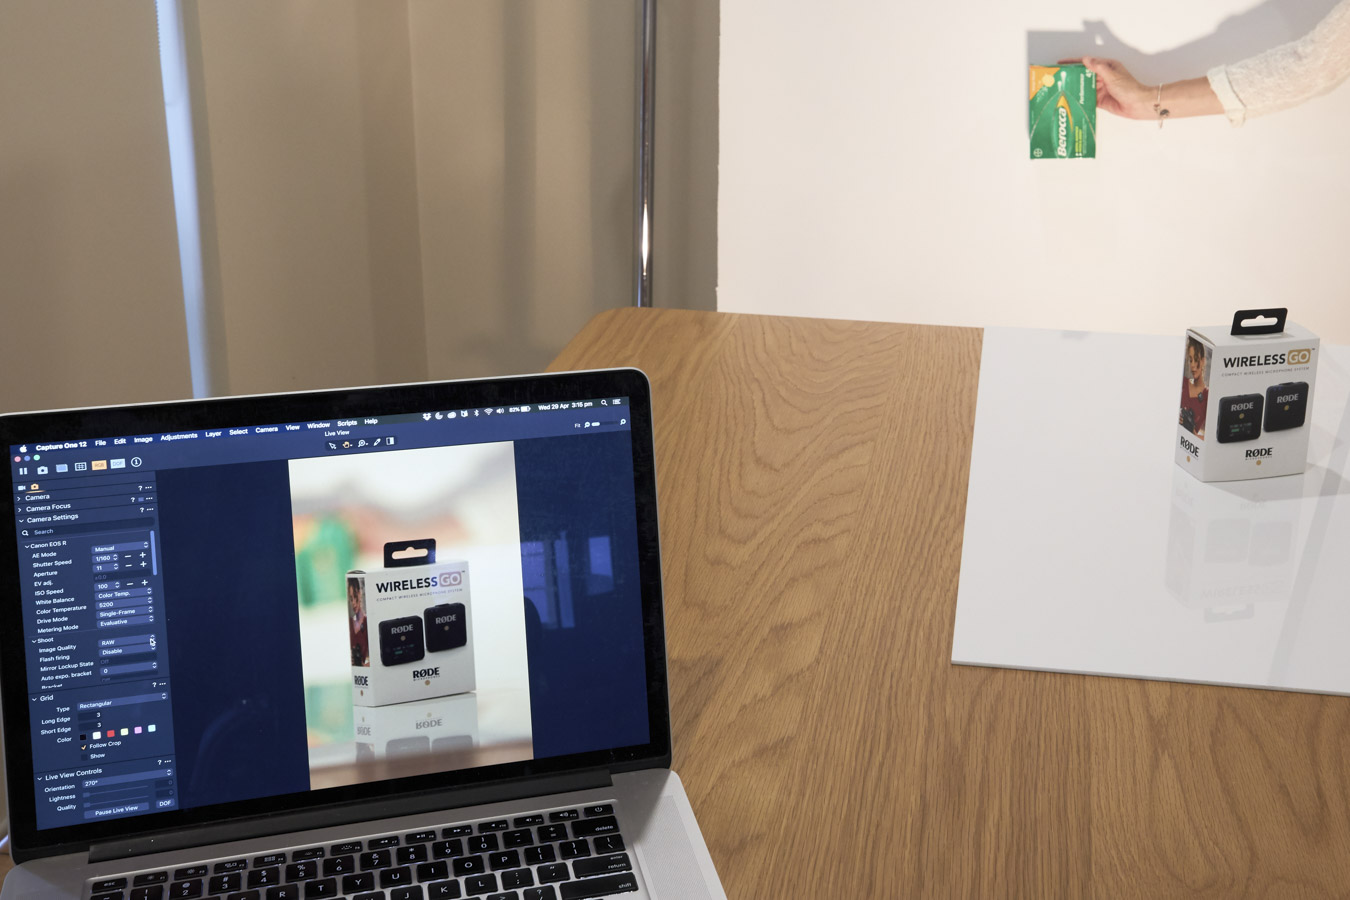
Take another test shot when you’ve positioned the light higher and you should see that the background and surface is now reading at 255 and also the line from the end of the perspex has gone.
Step eight – key light
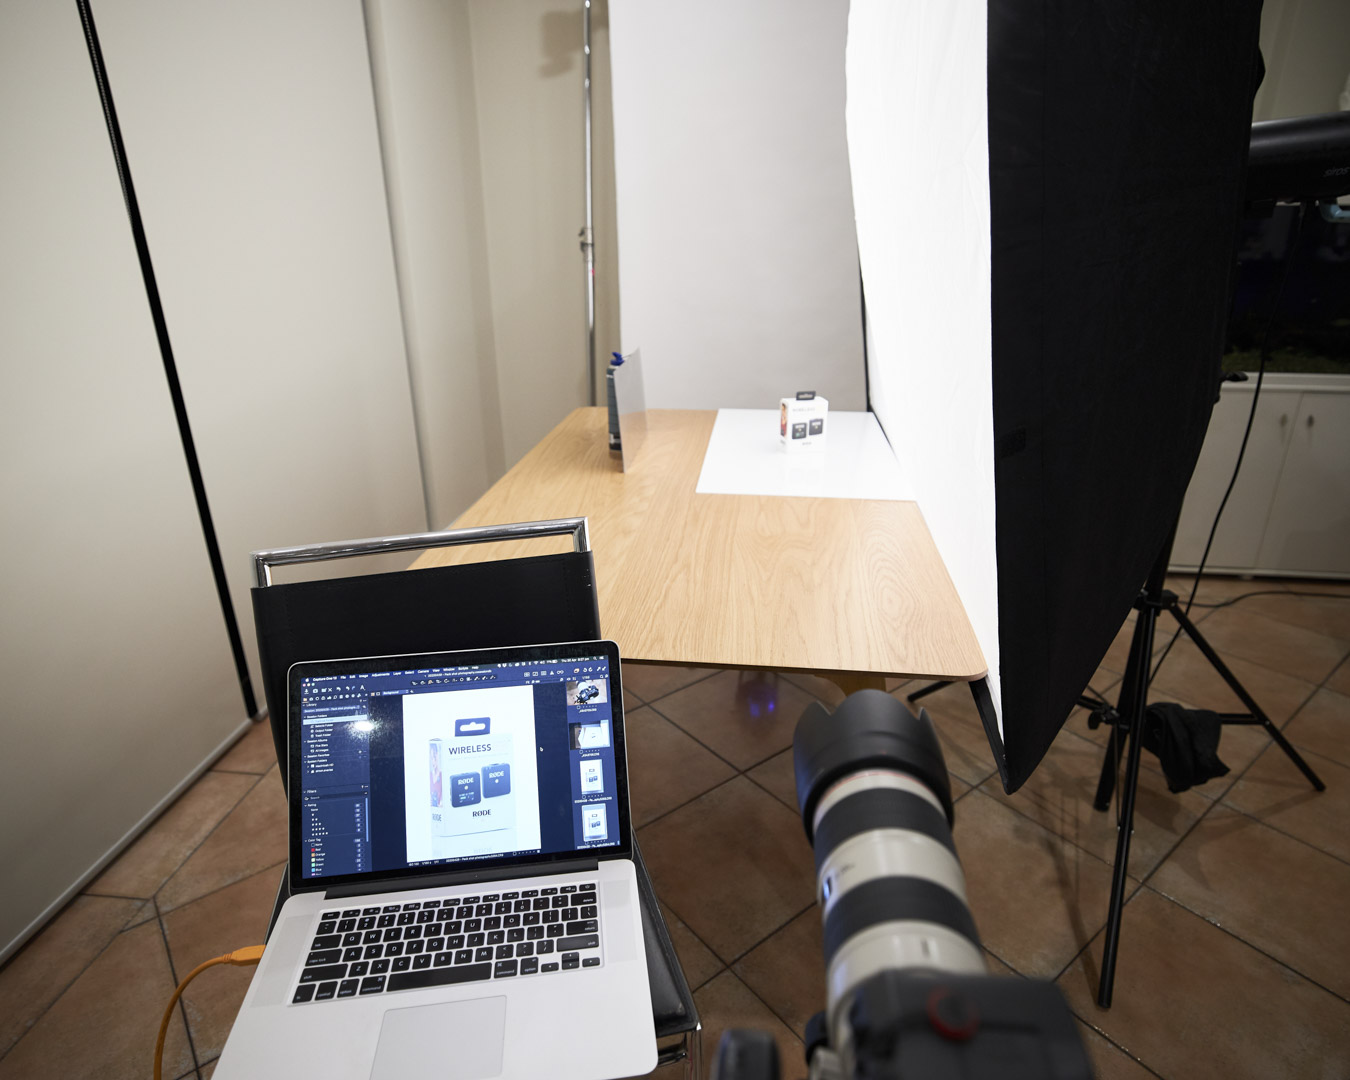
Now that you’ve got your composition and background all set, it’s time to bring in the key light at one side of the table to expose the product correctly. When choosing your light shaper, it’s ideal to use the largest softbox that you have available to you, and preferably a square or oblong shape as this is more flattering and suits most product surfaces.
Position the light as close to the subject as possible as this will create a nice soft wrap-around light.
Tip: the softbox will seem smaller relative to the subject if you move it further away. It will also create a harder light with more contrast.
Take a test shot and correct the exposure if needed. Now we have a nice clean straight out of camera pack shot setup that is versatile enough to swap out product after product and get through a large quantity of shots in one day.
A few more things to do before you get going though!
Step nine – white balance
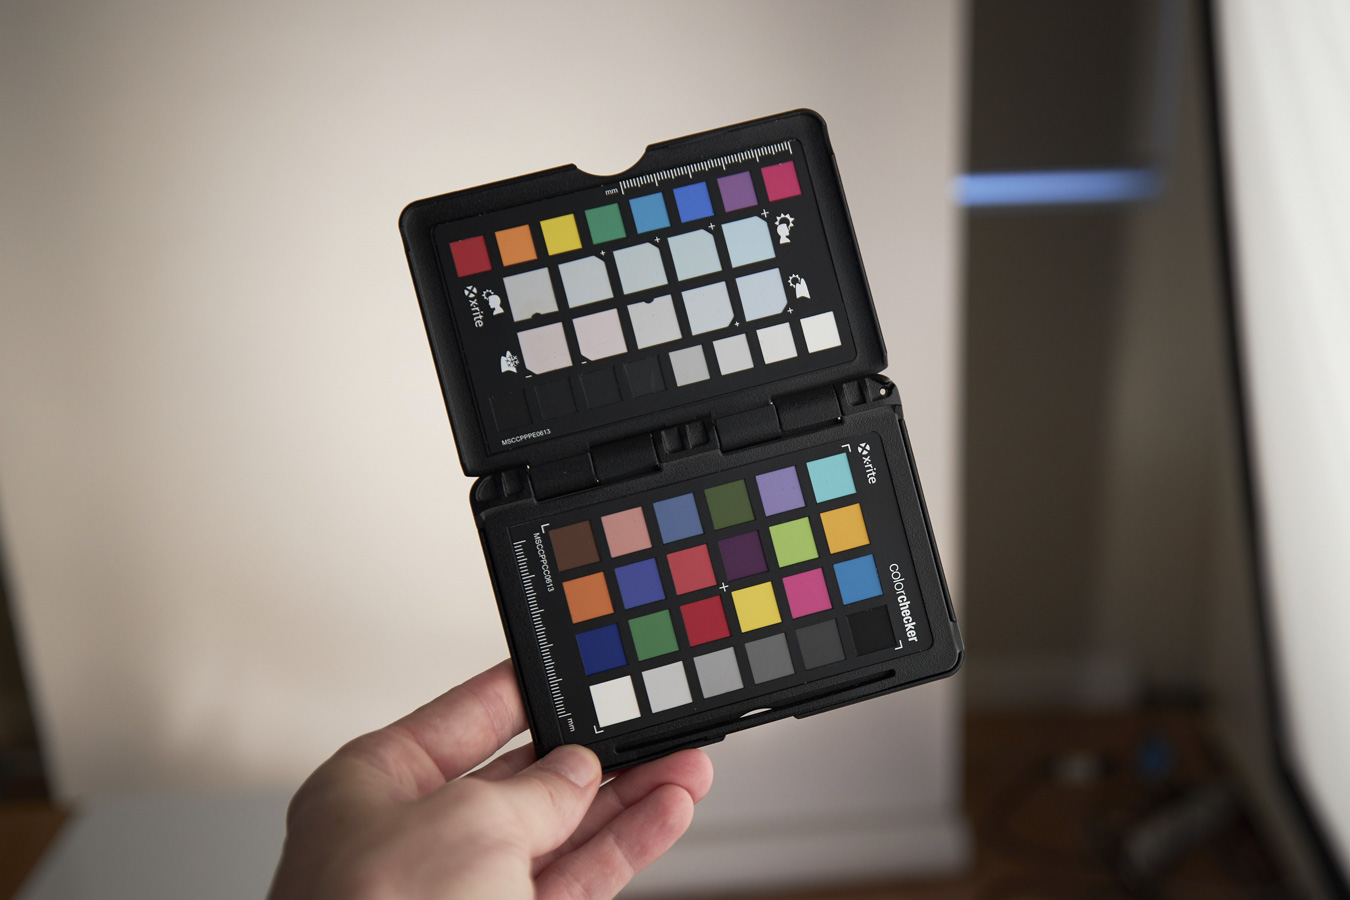
Remember that colour accuracy is important when you’re photographing products as they need to be advertised correctly. I’m setting my white balance to flash then taking a photo with a colour checker which will allow me to match it perfectly in postproduction. It’s good to set your white balance once you have your lighting finished.
Step ten – fill
As I have white blinds on the opposite side of the key light, I’m happy with the shadow side of the product. However, if you wanted to control the intensity, this is where the use of black card, mirror or any white bounce card will come in handy.
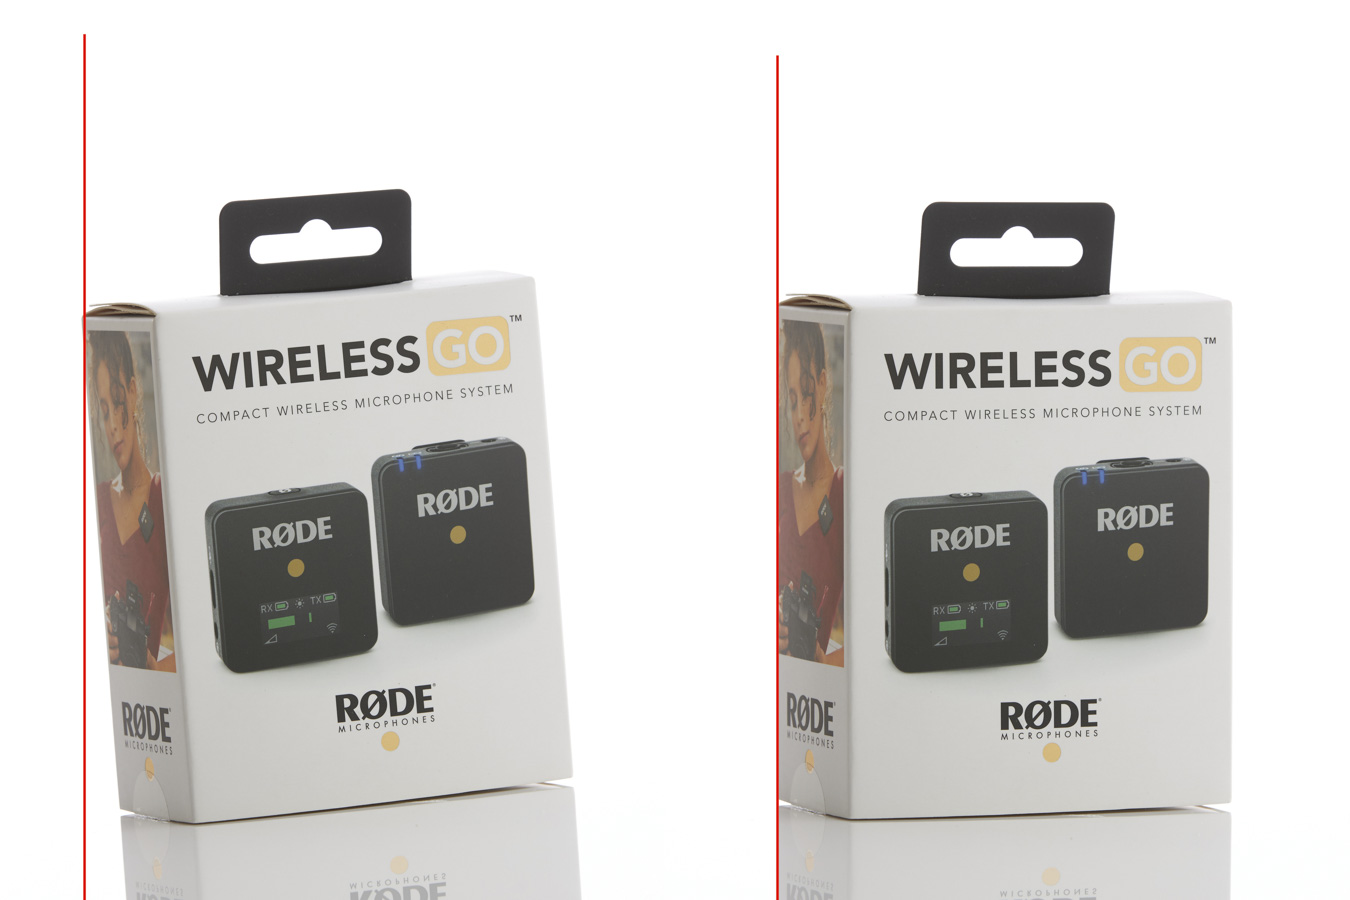
I’m using a “black presentation board” from Officeworks, you can lean it up against anything or cut a small block of wood and Blu Tac it together. If you want to darken the shadow side, you’ll need to flag off light which means bringing the black card closer. Here’s a comparison between no card on the left and on the right, I’ve placed the card 7cm away from the product.
You can control the intensity by changing the distance at which the black card is placed. If you move it further away, you’ll get a lighter shadow.
If you would like to add more light, use the mirror or white foam board – or anything white.
And here’s the final shot, you should now be able to change through a lot of different products without having to change much except for how you chose to fill in the shadow side of the image.
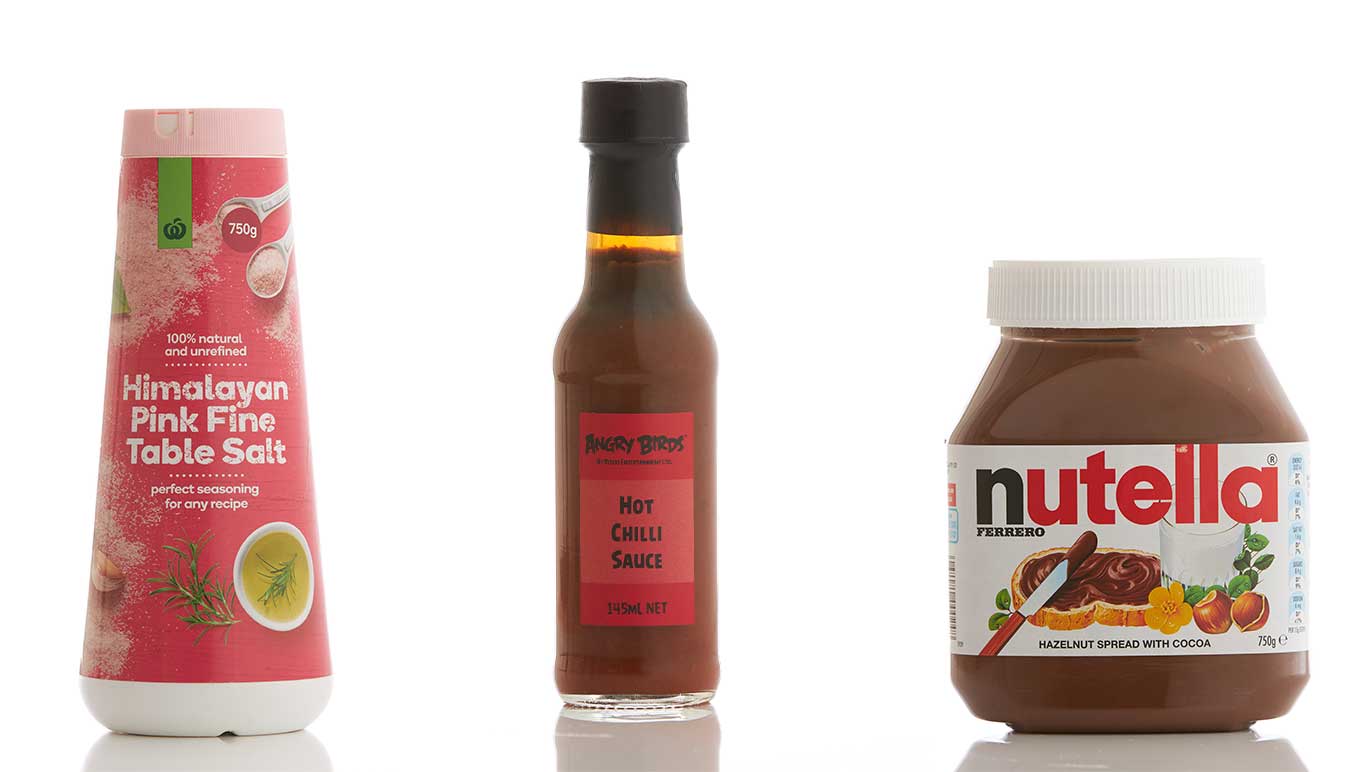
Here are a few different products to show you how versatile this setup is.
If you have any questions or need to access equipment to try this set up, contact SUNSTUDIOS hire or showroom in Sydney or Melbourne.
